
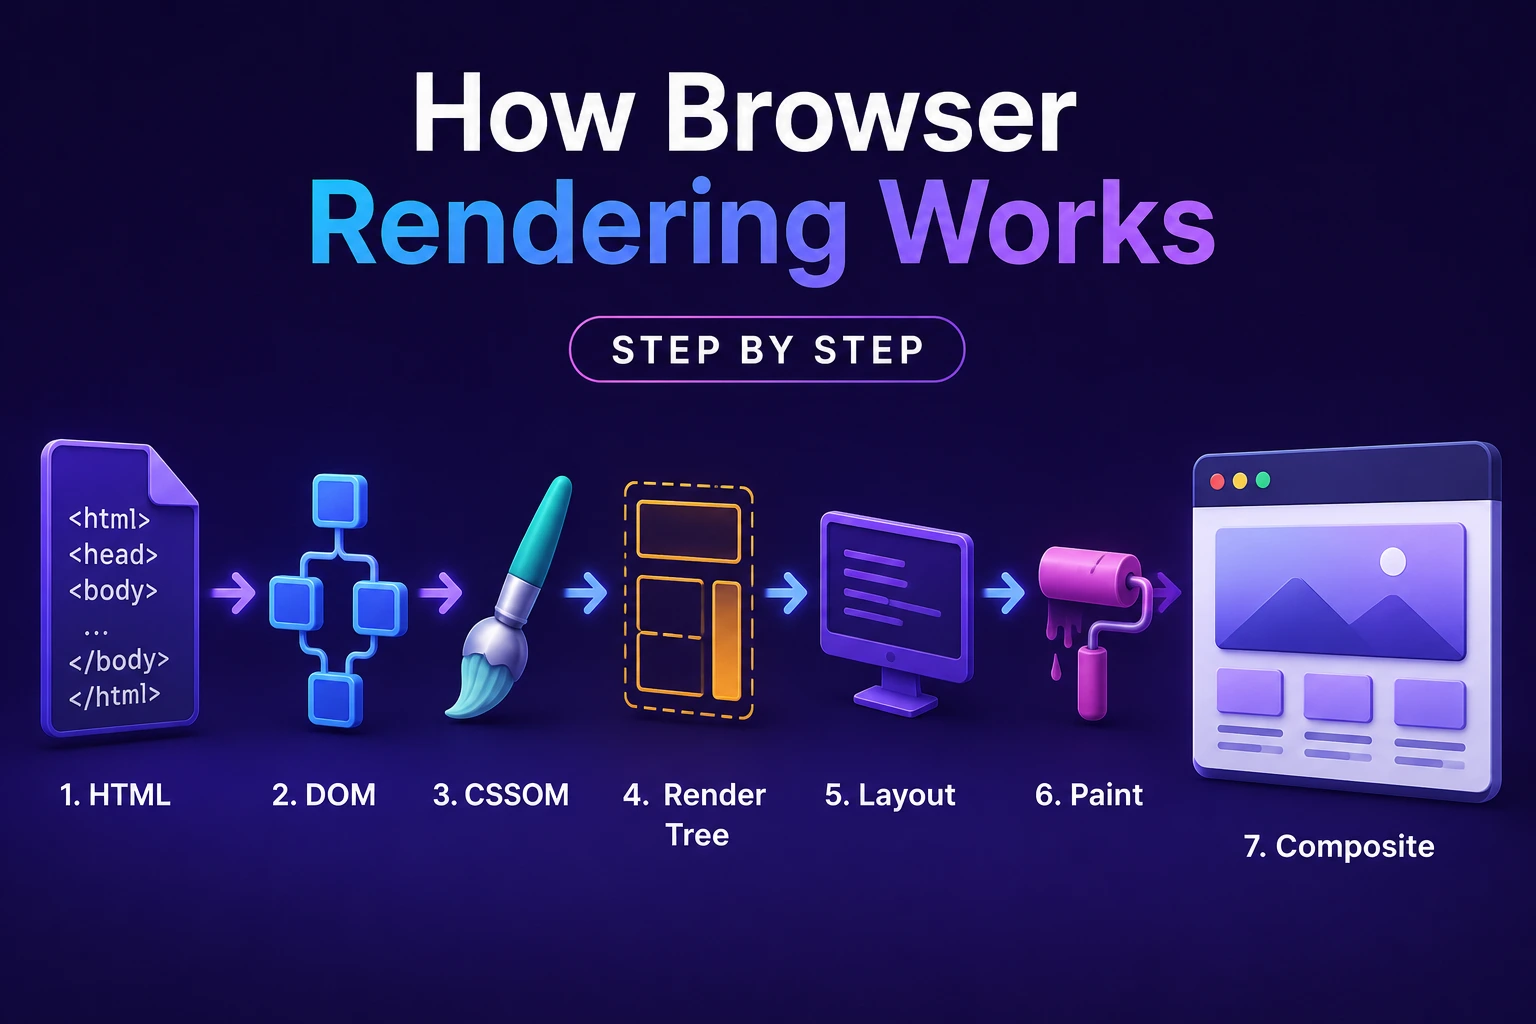
How Browser Rendering Works Step by Step
When a user enters a URL, the browser does much more than download one HTML file.
It may need to:
- Resolve the domain
- Establish a secure connection
- Request the document
- Process redirects
- Check caches
- Stream and parse HTML
- Discover additional resources
- Build the DOM
- Parse stylesheets
- Execute scripts
- Calculate styles
- Create layout boxes
- Paint visual content
- Rasterize drawing instructions
- Composite layers
- Respond to later interactions
These operations do not always happen one after another. Modern browsers perform many of them incrementally and in parallel.
Understanding this pipeline helps developers diagnose:
- Blank screens
- Slow initial content
- Render-blocking resources
- Layout shifts
- Delayed interactions
- Font-loading problems
- Animation stutter
- Excessive layout or paint work
What Is Browser Rendering?
Browser rendering is the process of converting web resources into the visual and interactive document presented to a user.
The main inputs include:
- HTML
- CSS
- JavaScript
- Images
- Fonts
- SVG
- Video
- Application data
The browser creates several internal representations from those resources and uses them to determine:
- What content exists
- How it should be styled
- Where it should be positioned
- What must be painted
- Which parts can be composited separately
- How the page responds to input
The critical rendering path refers to the work required before the browser can begin presenting useful content.
Browser Engines
Major browsers use different engines:
- Chrome and Edge use Blink.
- Safari uses WebKit.
- Firefox uses Gecko.
The broad concepts are similar, but internal data structures and optimization strategies differ.
Terms such as “render tree” are useful conceptual models. A specific browser may use several internal trees for style, layout, paint, compositing, accessibility, and hit testing rather than one literal render tree.
Avoid writing performance code that depends on undocumented engine internals.
Pipeline Overview
A simplified navigation looks like this:
- Parse the URL.
- Check navigation and HTTP caches.
- Resolve the domain.
- Establish or reuse a connection.
- Negotiate TLS and HTTP.
- Request the document.
- Stream and parse HTML.
- Discover and fetch subresources.
- Build the DOM.
- Parse CSS and calculate styles.
- Execute JavaScript according to its loading mode.
- Construct layout information.
- Paint and rasterize content.
- Composite layers.
- Present a frame.
- Continue updating the page as resources and data arrive.
The browser can overlap several stages. It does not always wait for one resource to finish before discovering the next.
Step 1: Parse the URL
Given:
https://example.com/products?category=laptops#reviewsthe browser identifies:
- Scheme:
https - Host:
example.com - Path:
/products - Query:
category=laptops - Fragment:
reviews
The fragment is handled by the browser and is not normally included in the HTTP request.
The browser may also apply:
- HSTS rules
- Service-worker interception
- Navigation policies
- Existing connection reuse
- Cached redirects
- Browser-extension behavior
Step 2: Check Caches
Before downloading a resource, the browser may check:
- Memory cache
- Disk cache
- Service-worker cache
- Previously stored HTTP metadata
- Back-forward cache for history navigation
A cached response may be reused directly or revalidated with the server.
Example conditional request:
GET /styles.css HTTP/1.1
Host: example.com
If-None-Match: "styles-v8"
If unchanged:
HTTP/1.1 304 Not Modified
ETag: "styles-v8"
The browser can reuse the previously stored content.
Correct caching can remove network transfers, but stale or incorrectly cached HTML can also cause deployment problems.
Step 3: Resolve DNS and Establish a Connection
If no reusable connection exists, the browser resolves the host to a network address.
For HTTPS, it then establishes a TLS-protected connection and verifies the server certificate.
Depending on the negotiated protocol:
- HTTP/1.1 typically uses TCP.
- HTTP/2 multiplexes streams over a connection.
- HTTP/3 runs over QUIC.
Connection setup can contribute to response delay, especially when:
- The server is geographically distant
- DNS resolution is slow
- Several third-party origins are used
- Connections cannot be reused
- Redirect chains introduce new origins
Reducing unnecessary origins and redirects can shorten the path to the first response bytes.
Step 4: Request the HTML Document
A simplified request:
GET /products HTTP/1.1
Host: example.com
Accept: text/html
Accept-Encoding: gzip, br
A simplified response:
HTTP/1.1 200 OK
Content-Type: text/html; charset=utf-8
Content-Encoding: br
Cache-Control: public, max-age=60
The browser does not necessarily wait for the entire HTML response before parsing it. It can begin processing streamed bytes as they arrive.
Server response time matters because the browser cannot parse HTML it has not received.
Step 5: Decode and Stream the HTML
The browser:
- Decompresses the response when necessary.
- Decodes bytes using the selected character encoding.
- Tokenizes the HTML.
- Constructs DOM nodes.
- Discovers referenced resources.
An early character-encoding declaration helps the browser interpret bytes correctly:
<meta charset="utf-8">Place it near the beginning of the document.
Incorrect encoding can produce corrupted text and, in some cases, require reparsing.
Step 6: Build the DOM
The DOM represents the document structure.
HTML:
<main>
  <article class="product">
    <h1>Laptop</h1>
    <p>Product description</p>
  </article>
</main>
Conceptual DOM:
Document
└── html
    ├── head
    └── body
        └── main
            └── article.product
                ├── h1
                └── p
The DOM is not a screenshot. It is an object model that application code can read and modify.
JavaScript can:
- Add elements
- Remove elements
- Change text
- Modify classes
- Set attributes
- Register event listeners
Those changes may trigger later style, layout, paint, or compositing work.
Step 7: Discover Subresources
As the parser encounters elements such as these:
<link rel="stylesheet" href="/styles.css">
<script src="/app.js"></script>
<img src="/hero.webp" alt="">
the browser schedules requests for their resources.
Browsers also use a speculative or preload scanner to discover some resources ahead of the main parser, including while parser-blocking work is occurring.
Resource loading is therefore not a simple sequence of:
HTML → CSS → JavaScript → imagesSeveral downloads can overlap.
However, priority, dependencies, connection limits, and resource discovery time still affect when each resource becomes usable.
Step 8: Parse CSS and Build Style Information
The browser parses CSS rules and uses them to determine the computed style of relevant elements.
Example:
.product {
  display: grid;
  gap: 1rem;
}

.product h1 {
  color: navy;
  font-size: 2rem;
}
Computed style depends on:
- User-agent styles
- Author stylesheets
- Inline styles
- Inheritance
- Cascade layers
- Selector specificity
- Source order
- Media queries
- Container queries
- User preferences
The CSS Object Model, or CSSOM, makes stylesheets accessible through browser APIs. The rendering engine also creates internal style data optimized for matching and layout.
Why CSS Can Block Rendering
The browser generally needs applicable CSS before it can render styled content correctly.
Rendering too early without a required stylesheet could cause a flash of unstyled content and immediate layout changes.
Stylesheets matching the current media conditions can therefore delay initial rendering.
Example:
<link
  rel="stylesheet"
  href="/styles.css"
>
A stylesheet for a nonmatching media condition may be fetched at a different priority without blocking the current rendering path in the same way:
<link
  rel="stylesheet"
  href="/print.css"
  media="print"
>
CSS can also affect JavaScript execution because a parser-blocking script may request computed style information.
CSS Optimization Principles
For critical styles:
- Keep required CSS reasonably small.
- Remove rules that are genuinely unused.
- Compress CSS responses.
- Cache versioned stylesheets.
- Avoid long chains of CSS imports.
- Load noncritical styles deliberately.
- Use critical inline CSS only when measurement justifies it.
Inlining too much CSS increases HTML size and prevents independent caching.
Splitting CSS into too many files can also create unnecessary request and coordination overhead. Measure the result.
Step 9: Execute JavaScript According to Loading Mode
Script behavior depends on how it is included.
Classic parser-blocking script
<script src="/app.js"></script>When the HTML parser encounters this classic external script, it generally:
- Pauses parsing.
- Waits for the script to be available.
- Executes it.
- Continues parsing.
This behavior exists because the script can change the document:
document.write("<p>Inserted content</p>");or inspect elements parsed so far.
Large parser-blocking scripts in the document head can delay DOM construction and initial rendering.
Deferred script
<script
  src="/app.js"
  defer
></script>
A deferred script:
- Downloads while HTML parsing continues
- Executes after parsing finishes
- Preserves document order relative to other deferred scripts
- Runs before
DOMContentLoaded
defer is usually appropriate for scripts that need the parsed document but do not need to block HTML construction.
Asynchronous script
<script
  src="/analytics.js"
  async
></script>
An asynchronous script:
- Downloads in parallel
- Executes as soon as it is available
- Does not preserve order relative to other async scripts
- Can execute before or after parsing finishes
Use it for independent scripts that do not rely on DOM readiness or execution order.
Third-party scripts can still consume main-thread time even when loaded asynchronously.
JavaScript modules
<script
  type="module"
  src="/app.js"
></script>
Module scripts:
- Support imports and exports
- Are deferred by default
- Build a dependency graph
- Execute after the document has been parsed
- Use strict mode
- Are fetched with CORS rules
Adding async changes module scheduling behavior, so use it only when order and document timing are unimportant.
MDN documents the differences among classic, deferred, asynchronous, and module scripts.
JavaScript Can Delay Rendering Without Blocking Parsing
Even a deferred script can delay interactivity or rendering if it performs a long synchronous task:
const startedAt = performance.now();

while (
  performance.now() - startedAt < 2000
) {
  // Block the main thread.
}
During this work, the browser may be delayed from:
- Processing input
- Running other JavaScript
- Performing rendering work
- Presenting a new frame
Loading mode solves resource-ordering problems. It does not make expensive JavaScript execution free.
Step 10: Calculate Computed Styles
After enough DOM and CSS information is available, the browser determines which rules apply to each relevant element.
This stage is often called style calculation or style recalculation.
The cost depends on factors such as:
- Number of affected elements
- Selector matching
- DOM structure
- Inheritance
- Number of changed classes or attributes
- Scope of invalidation
- Browser optimizations
Changing one class does not necessarily cause every style on the page to be recalculated. Engines track which parts may be affected.
Do not assume that one complex selector is automatically the primary problem. Use a performance trace.
Step 11: Build Layout Information
The browser determines boxes, dimensions, and positions.
Layout considers:
- Viewport dimensions
- Normal document flow
- Flexbox
- Grid
- Positioning
- Margins
- Padding
- Borders
- Text wrapping
- Font metrics
- Intrinsic image sizes
- Scroll containers
- Writing modes
- Aspect ratios
Example:
.product-grid {
  display: grid;
  grid-template-columns:
    repeat(auto-fit, minmax(16rem, 1fr));
  gap: 1rem;
}
The browser calculates the size and location of each grid item based on the available space.
Layout Is Not Always Global
Changing layout-related information may affect:
- One component
- A subtree
- Siblings
- Ancestors
- A larger portion of the page
The scope depends on the layout relationship and containment.
Browsers attempt to avoid recalculating unaffected content.
The expensive pattern is often not “layout occurred.” It is that JavaScript repeatedly forces layout during one task.
Forced Synchronous Layout
Problematic:
for (const card of cards) {
  card.style.width = "300px";

  console.log(
    card.getBoundingClientRect().height
  );
}
The style write makes layout information stale. The geometry read may force the browser to calculate layout immediately.
Better:
const measurements = cards.map(card => ({
  card,
  height:
    card.getBoundingClientRect().height
}));

for (const measurement of measurements) {
  measurement.card.style.width =
    measurement.height > 200
      ? "300px"
      : "240px";
}
Group reads before writes.
For more detail, see How to Reduce Reflows and Repaints in CSS.
Step 12: Determine What Participates in Rendering
The relationship between DOM elements and rendered boxes is more nuanced than “visible elements are included.”
display: none
.hidden {
  display: none;
}
The element remains in the DOM but does not generate a normal layout box.
visibility: hidden
.hidden {
  visibility: hidden;
}
The element normally retains its layout space but is not visibly painted.
opacity: 0
.hidden {
  opacity: 0;
}
The element:
- Retains layout space
- Can remain interactive
- Can remain focusable
- May still participate in compositing
Do not replace display: none with opacity: 0 merely for performance. They have different layout, interaction, and accessibility semantics.
Offscreen elements
An element below the viewport can still participate in style and layout.
Techniques such as content-visibility: auto can allow browsers to skip some rendering work for offscreen sections, but they require testing for layout stability and accessibility behavior.
Step 13: Paint
After layout, the browser determines how content should be drawn.
Paint instructions can include:
- Text
- Backgrounds
- Borders
- Images
- Shadows
- Gradients
- Decorations
- SVG content
- Clipping
- Filters
Paint is not necessarily a direct loop that colors every screen pixel individually. Browsers create drawing records or display lists that are later rasterized.
Painting cost depends on:
- Size of the affected area
- Complexity of effects
- Number of overlapping elements
- Clipping
- Shadows and filters
- Browser and device
- Whether content can be reused
A small color change may be inexpensive. Repainting a full-screen blurred effect on every frame may be costly.
Step 14: Rasterization
Rasterization converts drawing instructions into pixel data, often in tiles.
Work may occur across:
- Main thread
- Raster worker threads
- GPU processes
- Platform graphics systems
Implementation differs among browsers and devices.
Large painted areas, high-resolution screens, filters, and image-heavy pages can increase raster work and memory usage.
Step 15: Compositing
The browser may place portions of the page into separate composited layers.
The compositor combines layers into the final frame.
This can allow some changes—particularly transforms and opacity changes—to be applied without recalculating layout or repainting the element’s contents.
Example:
.card {
  transform: translateY(0);
  opacity: 1;
  transition:
    transform 180ms ease,
    opacity 180ms ease;
}

.card.is-hidden {
  transform: translateY(8px);
  opacity: 0;
}
These properties are often good animation candidates.
However:
- Compositor behavior is not guaranteed.
- A transform is not automatically “free.”
- Large layers consume memory.
- Filters and blending can remain expensive.
- Too many layers create overhead.
- Layer promotion varies by engine and device.
Use DevTools to inspect actual behavior.
Step 16: Present the Frame
Once the required visual work is complete, the browser presents a frame to the display.
For smooth motion on a 60 Hz display, a new frame is available approximately every 16.7 milliseconds. Higher-refresh displays provide even less time per frame.
Not all frames require complete style, layout, and paint work. The browser reuses previous results whenever possible.
Long JavaScript tasks can prevent a frame from being prepared on time, producing:
- Input delay
- Animation stutter
- Scroll lag
- Delayed visual feedback
The Page Is Not “Finished” After First Paint
Rendering continues as:
- Images arrive
- Fonts load
- JavaScript executes
- API data returns
- Components hydrate
- Ads appear
- User interactions update state
- Animations run
- Viewport size changes
A page is not rendered only once. Interactive sites repeatedly move through parts of the rendering pipeline.
Browser Lifecycle Milestones
DOMContentLoaded
This event fires after:
- The initial HTML has been parsed
- Deferred scripts have executed
- Module scripts required for the document have executed
It does not normally wait for every image and subresource to finish loading.
document.addEventListener(
  "DOMContentLoaded",
  () => {
    console.log("DOM ready");
  }
);
load
The window load event fires after the document and dependent resources have completed loading according to browser rules:
window.addEventListener(
  "load",
  () => {
    console.log("Page resources loaded");
  }
);
Do not delay essential initialization until load unless the code truly requires all relevant resources.
First paint and content metrics
The browser may paint content before either event.
Performance metrics focus on user-visible outcomes rather than one universal “page finished” moment.
How Images Affect Rendering
Images generally do not need to finish downloading before the browser parses later HTML. However, images can affect:
- Largest Contentful Paint
- Network priority
- Layout stability
- Memory
- Rasterization
- Paint cost
Provide dimensions:
<img
  src="/images/product.webp"
  alt="Blue laptop"
  width="800"
  height="600"
>
Responsive CSS:
img {
  display: block;
  max-width: 100%;
  height: auto;
}
The intrinsic dimensions give the browser an aspect ratio before the image finishes loading, reducing layout movement.
Do not lazy-load the main above-the-fold image automatically. Delaying the likely LCP image can harm loading performance.
How Fonts Affect Rendering
A web font must be downloaded, decoded, and made available before it can be used.
Font loading can cause:
- Invisible text
- Fallback text
- Font swapping
- Layout changes
- Additional network work
A font-display policy controls behavior:
@font-face {
  font-family: "Example Sans";
  src:
    url("/fonts/example.woff2")
    format("woff2");
  font-display: swap;
}
Reduce font cost by:
- Loading only required families
- Loading only required weights
- Using WOFF2
- Subsetting where appropriate
- Preloading only critical fonts
- Selecting similar fallback metrics
- Avoiding duplicate font providers
Preloading every font can compete with more important resources.
Client-Side Rendering and Hydration
In a client-rendered application, the initial HTML may contain only a shell:
<div id="app"></div>
<script type="module" src="/app.js"></script>
The browser must then:
- Download JavaScript.
- Execute the application.
- Fetch data.
- Create DOM nodes.
- Calculate styles and layout.
- Paint content.
In a server-rendered application, the initial response contains content, but JavaScript may still hydrate it to add interactivity.
A user can sometimes see a button before the hydration JavaScript makes it functional.
Rendering strategy changes where HTML is created, but the browser still performs style, layout, paint, and compositing work.
For rendering-strategy details, see Client-Side Rendering vs Server-Side Rendering.
Core Web Vitals and the Rendering Pipeline
Core Web Vitals measure user-visible outcomes:
Largest Contentful Paint
LCP measures when the largest relevant content element becomes visible.
It can be affected by:
- Server response delay
- Resource discovery
- Image loading
- CSS blocking
- JavaScript rendering
- Font loading
- Resource priority
Interaction to Next Paint
INP measures interaction responsiveness.
It can be affected by:
- Long JavaScript tasks
- Complex style calculation
- Expensive layout
- Large framework updates
- Paint and presentation delay
Cumulative Layout Shift
CLS measures unexpected visual movement.
It can be affected by:
- Images without dimensions
- Ads without reserved space
- Late banners
- Font metric changes
- Dynamically inserted content
Rendering work can influence these metrics, but one layout or paint event is not automatically a Core Web Vitals failure.
Good scores also do not guarantee indexing or rankings. Performance should support useful content and a reliable user experience, not replace them.
Common Rendering Bottlenecks
Slow initial HTML response
The browser cannot discover document resources before receiving enough HTML.
Late resource discovery
A critical image loaded only after JavaScript execution starts later than an image referenced directly in HTML.
Parser-blocking JavaScript
Classic scripts can stop DOM construction.
Large JavaScript bundles
Download, parse, compile, and execution time can delay rendering and interaction.
Render-blocking CSS
Critical stylesheets must arrive before stable initial rendering.
Excessive third-party code
Analytics, advertising, chat, and embeds can compete for network and main-thread time.
Large DOM trees
Large, frequently updated trees can increase style, layout, and memory costs.
Forced synchronous layout
Alternating style writes and geometry reads can repeatedly force layout.
Large paint areas
Full-screen effects and complex visual styles can make updates expensive.
Missing image dimensions
Late image sizing can move existing content.
Excessive hydration
Server-rendered HTML may still require a large amount of client JavaScript.
An Optimization Workflow
1. Identify the user-visible problem
Examples:
- Main image appears late.
- Navigation button responds slowly.
- Product list shifts after images load.
- Scrolling stutters.
- Page stays blank until JavaScript finishes.
2. Record a Performance trace
Use Chrome DevTools to inspect:
- Network activity
- Resource priority
- JavaScript tasks
- Style recalculation
- Layout
- Paint
- Rasterization
- Compositing
- Core Web Vitals insights
3. Map the problem to a pipeline stage
| Symptom | Possible area |
|---|---|
| Long blank screen | Server, CSS, parser-blocking script |
| Late hero image | Discovery or image priority |
| Visible but unresponsive UI | JavaScript or hydration |
| Moving content | Missing dimensions or late insertion |
| Stuttering animation | Main-thread, paint, or compositing |
| Slow filter input | JavaScript, framework rendering, layout |
4. Change one bottleneck
Examples:
- Defer one noncritical script.
- Add intrinsic image dimensions.
- Remove one request waterfall.
- Split one JavaScript bundle.
- Inline a small amount of genuinely critical CSS.
- Replace a layout animation with a transform.
- Paginate a large list.
5. Measure again
Compare:
- LCP
- INP
- CLS
- Main-thread time
- Layout duration
- Paint duration
- JavaScript bytes
- Request timing
- User-visible behavior
Browser Rendering Checklist
Document delivery
- HTML begins arriving quickly.
- Redirect chains are minimized.
- Compression is enabled.
- Character encoding is declared early.
- Important resources are discoverable from HTML.
CSS
- Critical CSS is delivered promptly.
- CSS import chains are avoided.
- Unused CSS is investigated.
- Noncritical styles are loaded deliberately.
- Inline CSS remains small and intentional.
JavaScript
- Classic parser-blocking scripts are justified.
- Application scripts use
deferor modules when appropriate. - Async scripts are independent.
- JavaScript is split by route or feature.
- Long tasks are identified.
- Third-party scripts are controlled.
Images and fonts
- Images include dimensions.
- The likely LCP image is not lazy-loaded.
- Responsive image sources are available.
- Only required fonts and weights load.
- Font-display behavior is intentional.
- Preloads are limited to critical resources.
Runtime rendering
- DOM size is reasonable for the interface.
- Layout reads and writes are grouped.
- Large lists use pagination or virtualization where appropriate.
- Animations are measured.
will-changeis used sparingly.- Layout shifts are prevented.
Validation
- Performance is tested on mobile hardware.
- Network and CPU throttling are used.
- Raw HTML is inspected.
- JavaScript-disabled behavior is understood.
- Search-engine rendering is checked for public pages.
- Real-user metrics are monitored.
Common Misconceptions
“The browser waits for the complete HTML before parsing”
Browsers can parse streamed HTML as bytes arrive.
“Resources download strictly in document order”
Discovery order matters, but browsers assign priorities and download several resources concurrently.
“All JavaScript blocks HTML parsing”
Classic scripts without suitable attributes generally block parsing. Deferred, asynchronous, and module scripts behave differently.
“The render tree contains everything visible to the user”
This is a useful simplification, but browser internals and CSS visibility behavior are more nuanced.
“Every DOM change triggers a full-page reflow”
Browsers invalidate and update affected portions where possible. Some changes require no layout.
“Transforms always run on the GPU”
Layer creation and hardware acceleration are implementation decisions. Measure the result.
“A page is complete when DOMContentLoaded fires”
Images, fonts, API data, hydration, and other work may still be unfinished.
“Faster rendering automatically improves rankings”
Rendering performance supports user experience and crawl reliability, but it does not replace relevance, originality, indexability, or content quality.
Final Thoughts
Browser rendering is not a rigid waterfall. It is an incremental pipeline in which network activity, parsing, style calculation, JavaScript, layout, paint, rasterization, and compositing can overlap.
The most useful mental model is:
- Obtain and stream the document.
- Build the DOM.
- Discover and fetch dependencies.
- Calculate styles.
- Execute scripts according to their loading mode.
- Determine layout.
- Record and rasterize visual content.
- Composite layers.
- Present a frame.
- Repeat relevant work as the page changes.
Understanding that pipeline helps you connect a user-visible problem to the browser work causing it.
Do not optimize every stage blindly. Record the page, identify the actual bottleneck, make one targeted change, and measure again.
Try Next
Other utilities you might find helpful
Regex Tester
Test and debug regular expressions with live matches.
Regex Debugger
Understand regex step-by-step with explanations.
JSON Formatter
Format, validate, and minify JSON instantly.
Base64 Encoder/Decoder
Encode and decode Base64 strings and files.
SQL Explain Parser
Analyze SQL execution plans and optimize queries.
DOM Complexity Analyzer
Analyze HTML DOM structure, detect deep nesting, count nodes, and identify performance issues instantly.